HYPERLINK, ANIMATION and MAIL MERGE
A hyperlink is an element in an HTML document that links to either another portion of the document or to another document altogether. On webpages, hyperlinks are usually colored purple or blue and are sometimes underlined. Inserting a HYPERLINK in a powerpoint is a helpful tool for me to create a shortcut to access a particular image, video, text or to the previous/next slides. It can be done in a word or in a shape.
STEP BY STEP PROCESSSelect the frame of a text box, and the whole area, including the white space around the text, will be clickable. The text will not be underlined or colored.
Select the text only, and the rest of the text box will not be clickable. The text will be underlined and colored.
You can add a hyperlink to any shape or group of shapes. To do that, select the frame of a shape. If you have placed text within a shape, it will not be underlined or colored.
Select the the text within a shape, and the rest of the shape area will not be clickable. The text itself will be underlined and colored.

- Select the desired object on your slide. Go to the INSERT tab and click the Hyperlink button as demonstrated in the picture.
- In the open window, click Place in this Document under Link to. Choose the slide in your presentation that you wish to use as a destination, then click OK.If you have created a custom slideshow (a certain sequence of slides) and you want to connect your object with it, click Custom Shows. Then tick the Show and return checkbox.

 If you

ANIMATION
Inserting Animation in Powerpoint is the most exciting and enjoyable experience in creating a report. You can personalize your design. Here you can use your Creativity and Imagination. And an effective way to color things up. I only knew the process in creating animation in every slide but I am shocked that there is a way to create also in shapes and texts.
- Select the object or text you want to animate.
- Select Animations and choose an animation.
- Select Effect Options and choose an effect.
Add a motion path to an object
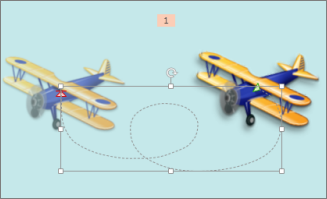
-
Click the object you want to animate.
-
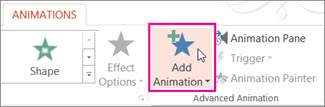
On the Animations tab, click Add Animation.
-
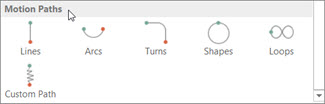
Scroll down to Motion Paths, and pick one.
 Tip: If you choose the Custom path option, you will draw the path that you want the object to take.
 To stop drawing a custom path, press Esc.
- Click the object you want to animate.
- On the Animations tab, click Add Animation.
- Scroll down to Motion Paths, and pick one.Tip: If you choose the Custom path option, you will draw the path that you want the object to take.To stop drawing a custom path, press Esc.
Advanced motion path options
-
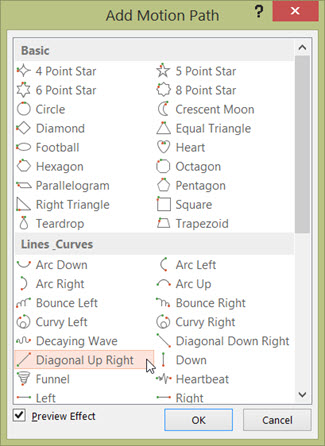
If you don’t see a motion path that you want, at the bottom of the gallery, click More Motion Paths.
 Click an animation to see a preview of how the object will move on your slide.
-
Once you pick the motion path you want, click OK.
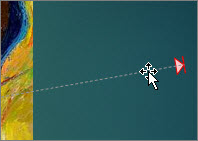
To remove and animation, on the slide, click the motion path (dotted line with arrow), and then press Delete.
- If you don’t see a motion path that you want, at the bottom of the gallery, click More Motion Paths.Click an animation to see a preview of how the object will move on your slide.
- Once you pick the motion path you want, click OK.To remove and animation, on the slide, click the motion path (dotted line with arrow), and then press Delete.


MAIL MERGE
Mail merge is a feature within most data processing applications that enables users to send a similar letter or document to multiple recipients. It enables connecting a single form template with a data source that contains information about the recipient’s name, address and other predefined and supporting data. The process of mail merge is creating personalized letters and pre-addressed envelopes or mailing labels for mass mailing from a form letter. The feature is usually employed in a word processing document which contains fixed text and variables.
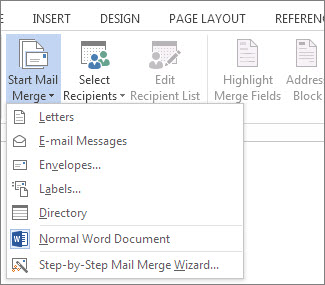
- On the Mailings tab, in the Start Mail merge group, choose Start Mail Merge, and then choose the kind of merge you want to run.
- Choose Select Recipients > Use an Existing List.

- Browse to your Excel spreadsheet, and then choose Open.
- If Word prompts you, choose Sheet1$ > OK.Note: Now the Excel spreadsheet is connected to the mail merge document you’re creating in Word.
Edit your mailing list
You can limit who receives your mail.
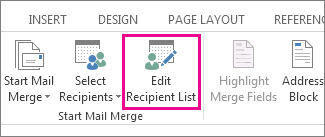
- Choose Edit Recipient List.
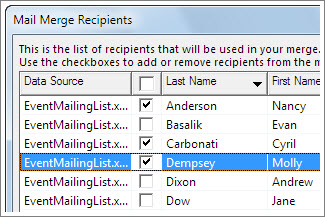
- In the Mail Merge Recipients dialog box, clear the check box next to the name of any person who you don't want to receive your mailing.
- On the Mailings tab, choose Preview Results.
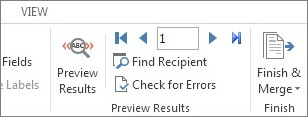
- Choose the Next
 or Previous
  record button to move through records in your data source and view how the records will appear in the document.
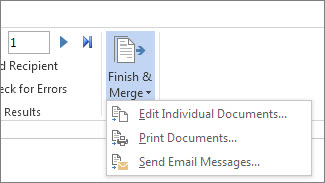
 - In the Finish group, choose Finish & Merge, and choose Print Documents or Send E-mail Messages.


Mail merge uses the MS WORD and MS Excel. First you should list the names of the person you are intend to deliver the letter in EXCEL. And transfer it in the WORD.
EXCEL is a powerful and helpful application that enables the user to perform calculations and record datas and formulas. It is typically used by teachers to compute the grades of students.


Comments
Post a Comment